My Recent Foray into Astrophotography | Astrophotography for Beginners | Astrophotography With an 8-inch Dob
My Recent Foray into Astrophotography
Astrophotography with an 8-inch Dobsonian
Astrophotography is hard.
You know what is even harder?
Astrophotography without a tracking mount—and I haven’t even
gotten to the DSOs yet! Well…I have, but the images are not perfect. It’s a
work in progress. I’m a work in progress.
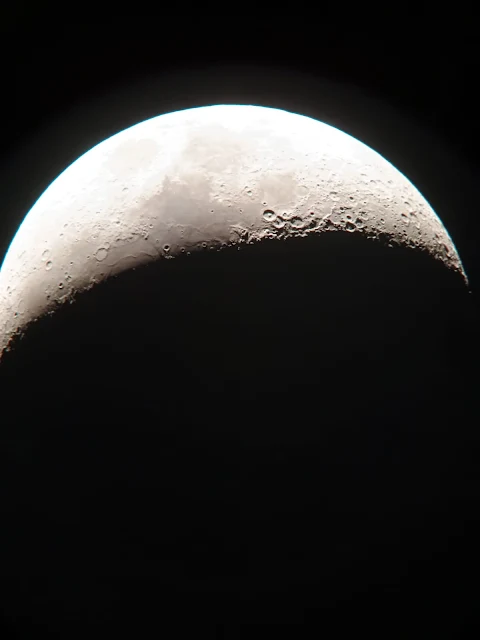
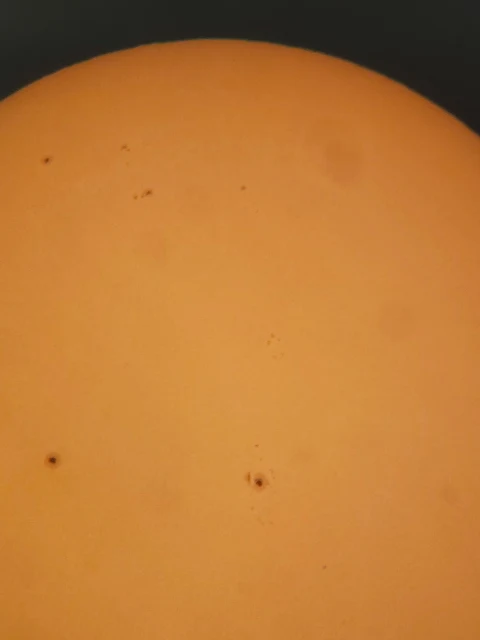
I did get some good pictures of the planets, the Sun and the
Moon though!
But first, let’s backtrack a bit.
I’ve had my 8-inch (203 mm) GSO Dobsonian telescope since I was an itsy-bitsy middle schooler. My initial views of the planets were not perfect. The Moon looked great through the telescope, but my chubby fingers got in the way of setting up the phone adapter correctly, and I couldn’t get any pictures. The one or two pictures I did get were blurry.
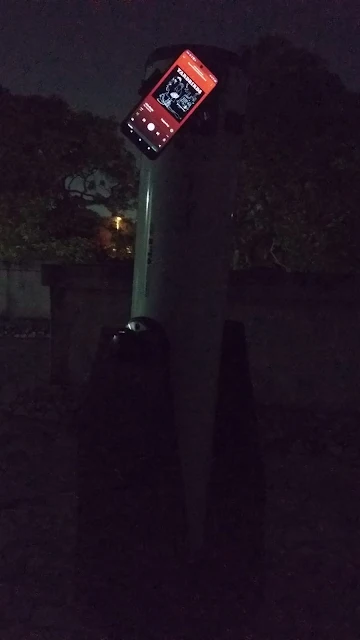 |
| My 8" Dobsonian— all set up for some astrophotography...but first, I gotta listen to my favourite Yardbirds album! |
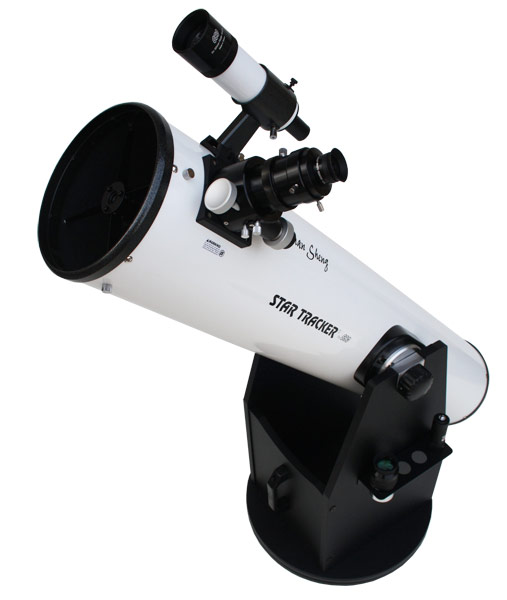 |
| 8-inch GSO Dobsonian telescope with a clutch mount and tension knob Credit: Tejraj |
My telescope then faced a rather grim fate. I packed it up, and the best birthday present I ever received sat abandoned in one corner of my room, collecting dust instead of the light that it was meant to.
This year however, I started my undergraduate physics degree
and I decided that it was high time I learned to operate a telescope. All that
weight I had gained had to be shed too, and I figured, what better way than to
haul a 13 kg tube and 12 kg mount up two flights of stairs?
And that is what I have been doing the past three months.
I started hauling my telescope all the way to the terrace, with no idea about
what I was doing. I went into it thinking I had to capture a single photographs or a few stills. I
had no idea I was supposed to take exposures, and later on I struggled to figure out how to track the planet, stack the
images and process the data without over-processing it to reveal hidden artefacts and
details in the image. This post contains a bit of what I wish I knew when I first started—a lot
of advice online is tailored to intermediates, and I want to offer a newbie’s
perspective. I hope it is helpful.
I have two eyepieces—the GSO Super View 30mm eyepiece and the GSO Plossl 9mm.
These arrived with the telescope. In the future, I definitely plan to expand my
collection—I have my sights set on the Baader Hyperion Zoom eyepiece, which
will provide a variety of magnifications to switch through.
 |
| The 30mm and 9mm eyepiece respectively Credit: Tejraj |
Also, a word of advice: the final stacked image is largely dependent on what astrophotographers call “seeing”. This refers to the overall atmospheric conditions, level of light pollution and the overall quality of the night sky. This will have a greater impact on your image than any skills and sophisticated equipment. In my opinion, a 6-inch telescope will give much better clarity and detailing in your data in a dark sky location than a 10-inch telescope in a more light-polluted area and unfavourable atmospheric conditions.
You might want to check the Bortle classification for your
area on https://www.lightpollutionmap.info/
before you begin. What’s the Bortle classification system you ask? It’s a scale
meant to classify skies according to how bright they are, and hence how
suitable they are for dark sky astrophotography and stargazing. A Bortle rating
of 1 is given to excellent dark sky sites, whereas a Bortle rating of 9 is
given to light-polluted, urban skies.
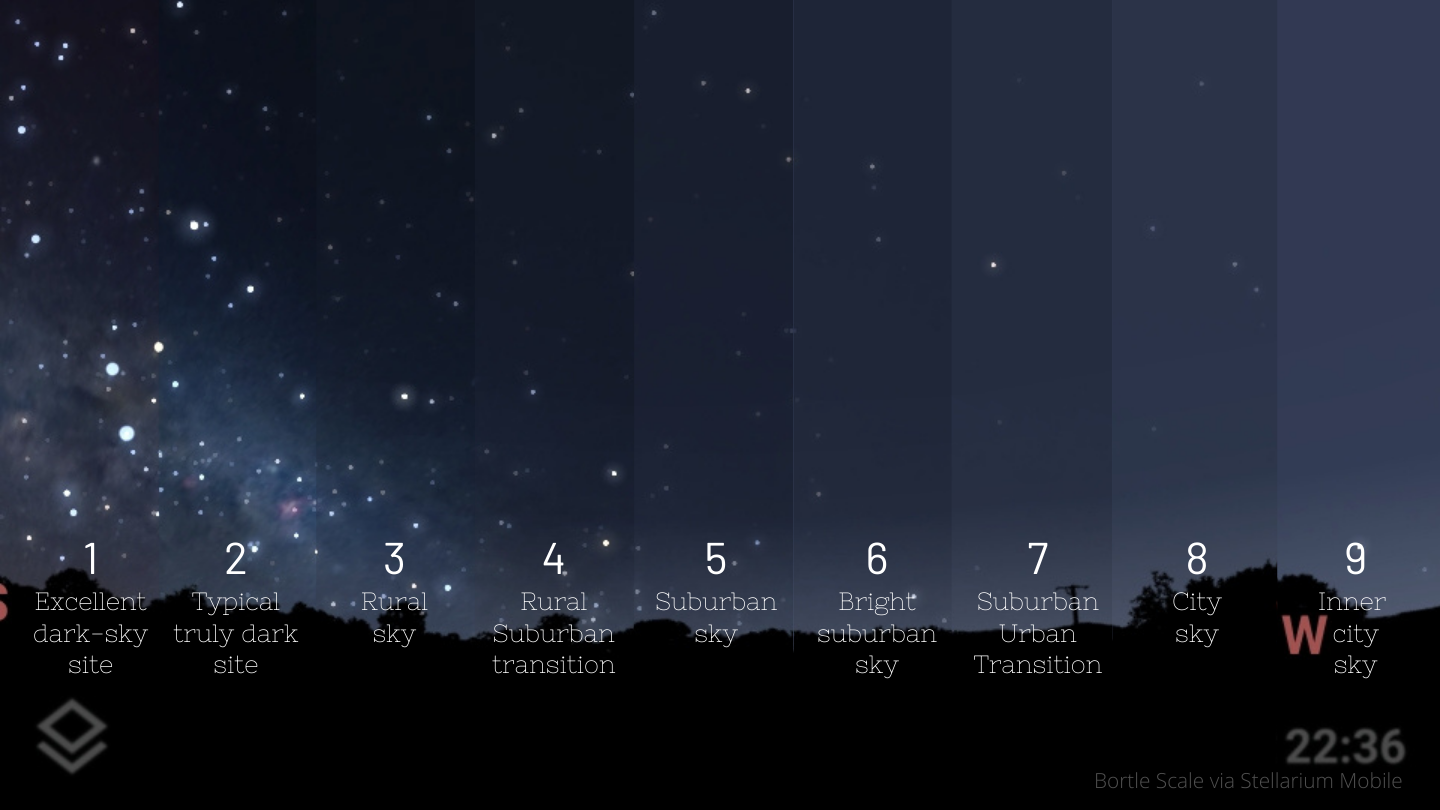 |
| The Bortle Scale on Stellarium Credit: Stellarium |
I live in a Bortle 9 area myself, so a high Bortle rating won’t
kill your chances of imaging the planets— but it would adversely impact the
quality of the data you’re seeking.
If you’re trying to image a planet, schedule your astrophotography
sessions close to that planet’s opposition dates. These are the particular
dates on which the planet is on the opposite side of the sky from the Sun, as
viewed from the Earth. It's a good time to observe them because they are at
their closest to Earth and in their full phase.
Try not to image through thick atmosphere, when the planets
are close to the horizon—this exacerbates atmospheric distortion due to
turbulence, and makes it more likely for you to be capturing your data right
above heat sources like trees and buildings. Try imaging the planets when they
are close to the zenith. I had to crane my neck really high to get my images,
but it really is worth the trouble.
Whatever device you choose to use in order to capture your
images—be it a regular cell phone camera or a DSLR—get the best phone/camera
adapter you can get your hands on. You do not want your mom’s phone to slip off
the adapter in the uncertain lighting and smash its screen your first day
shooting. Not that I would know anything about that happening.
So, how do I shoot the planets, the Sun and the Moon?
When capturing planets, (or any celestial body, really) you
want to take exposures, and not shots. This is to allow the
detector on your cell phone camera or DSLR to receive enough light to reveal
the finer details in the picture (Jupiter’s bands for example).
Once your finderscope is aligned with the eyepiece of your
telescope, you can simply point the ‘scope at a planet and start observing through
the eyepiece. Note that this alignment doesn’t have to perfect—it isn’t for me,
and that works just fine. You can align the finderscope using some distant target
(a tree or a building) or a star if it’s already dark.
So, you’ve got the finderscope and the eyepiece aligned and
you can see Jupiter in all its glory. What next?
For planets, with a regular cell phone camera stuck to your
eyepiece, you would want to lower the ISO to the 50-200 range, and adjust your
shutter speed till it’s in the range 1/10 to 1/90. Zoom in until you can see
the details.
For the Moon, an ISO of 300 works just fine for me. If
the Moon looks good through the ‘scope, go ahead and capture it!
A low ISO works well for the Sun as well.
Caution: Never observe the Sun directly through a telescope, or even a finderscope! Even a split second glance could cost you your eyesight.
I use the SolarLite solar filter to capture the Sun. Note that the solar filter goes over the objective lens and not the eyepiece. You can
fashion a simple solar filter for your finderscope as well, or use the trick
that I use: view the Sun directly through the focusing tube without any
eyepiece in it. Once you’ve got it, fix the telescope in place and insert the
eyepiece assembly!
Ensure that the objective remains cool, or it may impact the
quality of your data. The cooling fans at the bottom of my telescope help with
this.
If you can see the sunspots, your image is in focus.
If you cannot see any details—on the planets, the Sun or
even the Moon on an eyepiece—adjust the focuser and try again. It could also be
due to atmospheric turbulence, so don’t beat yourself over it. Do not shoot if
your image is overexposed/unfocused. Try to get as sharp a view as possible,
and start filming. A 3 to 5-minute exposure should suffice.
Since you’re not tracking the body as it moves across the
sky, it will eventually drift from your field of view. Gently nudge the
telescope back into position, and you should be able to capture the celestial
body drifting across for a steady few minute. Don’t worry about centering and
tracking just yet. There’s software to help with that.
These are the three applications I use:
1.
PIPP
.png) |
| A screenshot of my PIPP window |
PIPP will automatically centre and track the planet or any body for you. Add your source file, check the ‘Planetary’ option if you’re viewing planets or ‘Solar/Lunar Close-up’ or ‘Solar/Lunar Full Disc’ depending on your capture. Process your frames and save them in the AVI/TIFF format—whichever you prefer. I save my files as AVI files.
2.
AutoStakkert
.png) |
| Placing alignment points on Jupiter using AutoStakkert |
Once you’ve got your AVI/TIFF file, you can go ahead and stack your frames on AutoStakkert. Open your file, analyse it and select the top 25 to 50 percent of your frames for stacking. You can use the auto generated alignment points or manually select the areas of high contrast or the features on the planet that you think stand out. Go ahead and stack your image!
3.
RegiStax
.png) |
| Processing the image on RegiStax |
After the first two steps, you have an image that is nearly
done. All that is left is some minor touch-ups. Once you’ve got your image, open
it on RegiStax. Adjust the Wavelet Layers 2, 3 and 4 to sharpen the image. This
step requires some care, because over-processing can very easily lead to a funny-looking
image. You do not want to amplify noise; only the specific features (belts and
bands of Jupiter, the rings of Saturn) that you want to highlight. You can
adjust the colour balance using ‘RGB balance’, and align colours using ‘RGB
Align’.
If there’s a ghost ring in your image, the ‘Denoise/Deringing’
option might help.
And there you have it! Your very own image of Jupiter 715
million kilometres away or the Sun 150 million kilometres away—all from the comfort
of planet Earth. Incredible, isn’t it?
Here are my images:
 |




.jpg)
.jpg)
Comments
Post a Comment